

- Что дальше
- Почему вы должны стать сертифицированным?
- Class: tls.tlssocket#
- Event: ‘keylog’#
- Event: ‘newsession’#
- Event: ‘ocspresponse’#
- Event: ‘resumesession’#
- Event: ‘secure’#
- Event: ‘secureconnect’#
- Event: ‘secureconnection’#
- Event: ‘session’#
- Get certified in 5 steps
- Opinions on javascript certification program offered by the international javascript institute
- How do i setup a ssl certificate for an express.js server?
- Java assoсiate && expert
- Javascript certification
- Modifying the default tls cipher suite#
- Node_extra_ca_certs
- Perfect forward secrecy#
- Requirements
- Server.addcontext(hostname, context)#
- Server.setticketkeys(keys)#
- Session identifiers#
- Session tickets#
- Ssl-рукопожатие
- Tls.checkserveridentity(hostname, cert)#
- Tls.connect(path[, options][, callback])#
- Tls.connect(port[, host][, options][, callback])#
- Tls.createsecurepair([context][, isserver][, requestcert][, rejectunauthorized][, options])#
- Tls.createserver([options][, secureconnectionlistener])#
- Tls.getciphers()#
- Tls.rootcertificates#
- Tls/ssl concepts#
- Tlssocket.enabletrace()#
- Tlssocket.exportkeyingmaterial(length, label[, context])#
- Tlssocket.getcertificate()#
- Tlssocket.getephemeralkeyinfo()#
- Tlssocket.getfinished()#
- Tlssocket.getpeercertificate([detailed])#
- Tlssocket.getpeerfinished()#
- Tlssocket.getpeerx509certificate()#
- Tlssocket.getprotocol()#
- Tlssocket.getsession()#
- Tlssocket.gettlsticket()#
- Tlssocket.getx509certificate()#
- Tlssocket.renegotiate(options, callback)#
- X509 certificate error codes#
- Зачем учить node.js?
- Изучение node.js
- Как все исправить?
- Как нормально запустить ssl сертификат на node js
- Как установить доверенный сертификат в систему средствами node.js?
- Мысли о необходимости сертификатов (вместо вступления)
- Платные курсы
- Подготовка к сдаче java programmer ii
- Свойство ca
- Сдача
- Сертификаты об окончании курсов
- Сертификация javascript разработчиков. мои впечатления
- Tlssocket.setmaxsendfragment(size)#
- Spoiler#handleclick”>отзыв
- Client-initiated renegotiation attack mitigation#
Что дальше
После получения Proffesional можно выбирать специализацию, по которой расти и в конечном итоге подтвердить свою квалификацию очередным сертификатом. Мой выбор пал в сторону ЕЕ и в конце года планирую подтвердить свою квалификацию вот по этому пути:
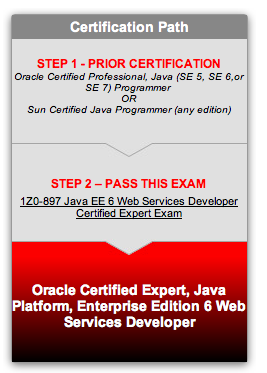
Тем более, что Oracle предоставляет прекрасный tutorial по Java EE: html версия, pdf версия. Но, само собой, главным обучением по этому направлению есть практика и об одном из своих личных проектов, который уже подходит к концу я еще расскажу в этому году.
Ну и, само собой, не забываем о приятной плюшке в виде Succsess Kit, который для разных уровней разный:
Как видно из таблици, помимо самого сертификата, который выдается при прохождении Java Programmer I, который выглядит вот так:
за получение статуса Professional выдют еще Personalized ID Card, которая до меня еще не добралась.
Так же появилось право Fulfill Oracle Partner Network Company Membership level requirements. Сам этот пункт ОЧЕНЬ интересный и заслуживает отдельной статьи, так как в некотором роде открывает новые возможности не только специалисту, но и компании, в которой он работает, но об этом в другой раз.
Почему вы должны стать сертифицированным?
Непрерывное образование зарезервированно для вашего будущего успеха.
Вы хотите карьеру с будущим? Вы должны регулярно обновлять свои навыки и знания. Если только вы уже не решили, что ваши нынешние навыки и работа достаточно хороши для вашего будущего.
Знания-это сила, особенно на нынешнем рынке труда. Документирование ваших навыков позволяет Вам двигаться вверх в Вашей организации.
Получение сертификата доказывает вашу приверженность к обновлению ваших навыков, дает вам доверие, необходимое для большего количества обязанностей, более крупных проектов и более высокой зарплаты.
Кроме того, документированные знания часто являются ключевым фактором при найме новых сотрудников. Ваш сертификат может продвинуть вашу карьеру или помочь вам начать новую.
Также имейте в виду, что сотрудники с сертификатами увеличивают шансы своей компании сохранить старых и получить новых клиентов. Вы сделаете своей компании одолжение, получив сертификат. Ожидайте, что ваша компания поддержит вас в этом.
Class: tls.tlssocket#
Added in: v0.11.4
Performs transparent encryption of written data and all required TLS
negotiation.
Instances of tls.TLSSocket implement the duplex Stream interface.
Methods that return TLS connection metadata (e.g.
tls.TLSSocket.getPeerCertificate() will only return data while the
connection is open.
Event: ‘keylog’#
Added in: v12.3.0, v10.20.0
The keylog event is emitted when key material is generated or received by
a connection to this server (typically before handshake has completed, but not
necessarily). This keying material can be stored for debugging, as it allows
captured TLS traffic to be decrypted. It may be emitted multiple times for
each socket.
A typical use case is to append received lines to a common text file, which
is later used by software (such as Wireshark) to decrypt the traffic:
const logFile = fs.createWriteStream('/tmp/ssl-keys.log', { flags: 'a' });

server.on('keylog', (line, tlsSocket) => {
  if (tlsSocket.remoteAddress !== '...')
    return;
  logFile.write(line);
});
Event: ‘newsession’#
The ‘newSession’ event is emitted upon creation of a new TLS session. This may
be used to store sessions in external storage. The data should be provided to
the ‘resumeSession’ callback.
The listener callback is passed three arguments when called:
Listening for this event will have an effect only on connections established
after the addition of the event listener.
Event: ‘ocspresponse’#
Added in: v0.11.13
The ‘OCSPResponse’ event is emitted if the requestOCSP option was set
when the tls.TLSSocket was created and an OCSP response has been received.
The listener callback is passed a single argument when called:
Typically, the response is a digitally signed object from the server’s CA that
contains information about server’s certificate revocation status.
Event: ‘resumesession’#
Added in: v0.9.2
The ‘resumeSession’ event is emitted when the client requests to resume a
previous TLS session. The listener callback is passed two arguments when
called:
The event listener should perform a lookup in external storage for the
sessionData saved by the ‘newSession’ event handler using the given
sessionId. If found, call callback(null, sessionData) to resume the session.
If not found, the session cannot be resumed. callback() must be called
without sessionData so that the handshake can continue and a new session can
be created. It is possible to call callback(err) to terminate the incoming
connection and destroy the socket.
Listening for this event will have an effect only on connections established
after the addition of the event listener.
The following illustrates resuming a TLS session:
const tlsSessionStore = {};
server.on('newSession', (id, data, cb) => {
  tlsSessionStore[id.toString('hex')] = data;
  cb();
});
server.on('resumeSession', (id, cb) => {
  cb(null, tlsSessionStore[id.toString('hex')] || null);
});
Event: ‘secure’#
Added in: v0.3.2Deprecated since: v0.11.3
The ‘secure’ event is emitted by the SecurePair object once a secure
connection has been established.
As with checking for the server
‘secureConnection’
event, pair.cleartext.authorized should be inspected to confirm whether the
certificate used is properly authorized.
Event: ‘secureconnect’#
Added in: v0.11.4
The ‘secureConnect’ event is emitted after the handshaking process for a new
connection has successfully completed. The listener callback will be called
regardless of whether or not the server’s certificate has been authorized. It
is the client’s responsibility to check the tlsSocket.authorized property to
determine if the server certificate was signed by one of the specified CAs.
If
tlsSocket.authorized === false, then the error can be found by examining the
tlsSocket.authorizationError property. If ALPN was used, the
tlsSocket.alpnProtocol property can be checked to determine the negotiated
protocol.
The ‘secureConnect’ event is not emitted when a <tls.TLSSocket> is created
using the new tls.TLSSocket() constructor.
Event: ‘secureconnection’#
Added in: v0.3.2
The ‘secureConnection’ event is emitted after the handshaking process for a
new connection has successfully completed. The listener callback is passed a
single argument when called:
The tlsSocket.authorized property is a boolean indicating whether the
client has been verified by one of the supplied Certificate Authorities for the
server. If tlsSocket.authorized is false, then socket.
The tlsSocket.alpnProtocol property is a string that contains the selected
ALPN protocol. When ALPN has no selected protocol, tlsSocket.alpnProtocol
equals false.
The tlsSocket.servername property is a string containing the server name
requested via SNI.
Event: ‘session’#
Added in: v11.10.0
The ‘session’ event is emitted on a client tls.TLSSocket when a new session
or TLS ticket is available. This may or may not be before the handshake is
complete, depending on the TLS protocol version that was negotiated. The event
is not emitted on the server, or if a new session was not created, for example,
when the connection was resumed.
On the client, the session can be provided to the session option of
tls.connect() to resume the connection.
See Session Resumption for more information.
For TLSv1.2 and below, tls.TLSSocket.getSession() can be called once
the handshake is complete. For TLSv1.3, only ticket-based resumption is allowed
by the protocol, multiple tickets are sent, and the tickets aren’t sent until
after the handshake completes.
So it is necessary to wait for the
‘session’ event to get a resumable session. Applications
should use the ‘session’ event instead of getSession() to ensure
they will work for all TLS versions. Applications that only expect to
get or use one session should listen for this event only once:
tlsSocket.once('session', (session) => {

  tls.connect({
    session: session,

  });
});
Get certified in 5 steps
- First familiarize yourself with the exam requirements, then prepare for the exam,
- Buy your exam voucher (It is valid for 12 months),
- Register on Assessment Platform,
- Schedule your exam date. Contact us directly on info@javascriptinstitute.org and suggest some days and hours,
- In the end take the exam.
Opinions on javascript certification program offered by the international javascript institute
How do i setup a ssl certificate for an express.js server?
This is my working code for express 4.0.
express 4.0 is very different from 3.0 and others.
4.0 you have /bin/www file, which you are going to add https here.
“npm start” is standard way you start express 4.0 server.
readFileSync() function should use __dirname get current directory
while require() use ./ refer to current directory.
First you put private.key and public.cert file under /bin folder,
It is same folder as WWW file.
no such directory found error:
  key: fs.readFileSync('../private.key'),

  cert: fs.readFileSync('../public.cert')
error, no such directory found
  key: fs.readFileSync('./private.key'),

  cert: fs.readFileSync('./public.cert')
Working code should be
key: fs.readFileSync(__dirname   '/private.key', 'utf8'),

cert: fs.readFileSync(__dirname   '/public.cert', 'utf8')
Complete https code is:
const https = require('https');
const fs = require('fs');

// readFileSync function must use __dirname get current directory
// require use ./ refer to current directory.

const options = {
   key: fs.readFileSync(__dirname   '/private.key', 'utf8'),
  cert: fs.readFileSync(__dirname   '/public.cert', 'utf8')
};


 // Create HTTPs server.

 var server = https.createServer(options, app);
Java assoсiate && expert
В видах сертификатов следует отметить, что независимо от специализации особый упор Oracle делает на базовые знания языка и именно по этому для того, чтобы иметь право получить звание Expert или выше по специальности необходимо подтвердить свои знания самого языка Java, путем получения сертификата Java Certified Preofessional Java Programmer.
Получить Professional в Java можно по следующему пути: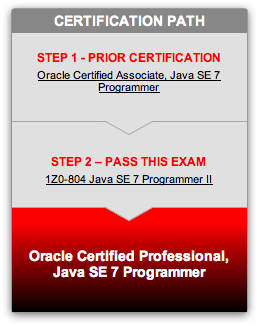
Иными словами, для начала необходимо получить статус Associate (сдав экзамен Java Programmer I), а после Professional (Java Programmer II). О первом я уже писал вот тут. И лишь после этого можно выбирать себе дальнейший путь сертифицирования.
Javascript certification
The JavaScript Institute offers you a JavaScript certification program designed by JavaScript experts. It will help you to comprehensively learn about JavaScript technology, as well as it will allow you to assess your programming skills and prove your competences.
JavaScript is the most commonly used programming language in the world and it is a highly desirable skill among IT professionals.
Modifying the default tls cipher suite#
Node.js is built with a default suite of enabled and disabled TLS ciphers. This
default cipher list can be configured when building Node.js to allow
distributions to provide their own default list.
The following command can be used to show the default cipher suite:
node -p crypto.constants.defaultCoreCipherList | tr ':' 'n'
TLS_AES_256_GCM_SHA384
TLS_CHACHA20_POLY1305_SHA256
TLS_AES_128_GCM_SHA256
ECDHE-RSA-AES128-GCM-SHA256
ECDHE-ECDSA-AES128-GCM-SHA256
ECDHE-RSA-AES256-GCM-SHA384
ECDHE-ECDSA-AES256-GCM-SHA384
DHE-RSA-AES128-GCM-SHA256
ECDHE-RSA-AES128-SHA256
DHE-RSA-AES128-SHA256
ECDHE-RSA-AES256-SHA384
DHE-RSA-AES256-SHA384
ECDHE-RSA-AES256-SHA256
DHE-RSA-AES256-SHA256
HIGH
!aNULL
!eNULL
!EXPORT
!DES
!RC4
!MD5
!PSK
!SRP
!CAMELLIA
This default can be replaced entirely using the –tls-cipher-list
command-line switch (directly, or via the NODE_OPTIONS environment
variable). For instance, the following makes ECDHE-RSA-AES128-GCM-SHA256:!RC4
the default TLS cipher suite:
node --tls-cipher-list='ECDHE-RSA-AES128-GCM-SHA256:!RC4' server.js

export NODE_OPTIONS=--tls-cipher-list='ECDHE-RSA-AES128-GCM-SHA256:!RC4'
node server.js
The default can also be replaced on a per client or server basis using the
ciphers option from tls.createSecureContext(), which is also available
in tls.createServer(), tls.connect(), and when creating new
tls.TLSSockets.
The ciphers list can contain a mixture of TLSv1.3 cipher suite names, the ones
that start with ‘TLS_’, and specifications for TLSv1.2 and below cipher
suites. The TLSv1.2 ciphers support a legacy specification format, consult
the OpenSSL cipher list format documentation for details, but those
specifications do not apply to TLSv1.3 ciphers. The TLSv1.
Despite the relative order of TLSv1.3 and TLSv1.2 cipher suites, the TLSv1.3
protocol is significantly more secure than TLSv1.2, and will always be chosen
over TLSv1.2 if the handshake indicates it is supported, and if any TLSv1.3
cipher suites are enabled.
The default cipher suite included within Node.js has been carefully
selected to reflect current security best practices and risk mitigation.
Changing the default cipher suite can have a significant impact on the security
of an application. The –tls-cipher-list switch and ciphers option should by
used only if absolutely necessary.
The default cipher suite prefers GCM ciphers for Chrome’s ‘modern
cryptography’ setting and also prefers ECDHE and DHE ciphers for perfect
forward secrecy, while offering some backward compatibility.
128 bit AES is preferred over 192 and 256 bit AES in light of specific
attacks affecting larger AES key sizes.
Old clients that rely on insecure and deprecated RC4 or DES-based ciphers
(like Internet Explorer 6) cannot complete the handshaking process with
the default configuration. If these clients must be supported, the
TLS recommendations may offer a compatible cipher suite. For more details
on the format, see the OpenSSL cipher list format documentation.
There are only 5 TLSv1.3 cipher suites:
'TLS_AES_256_GCM_SHA384''TLS_CHACHA20_POLY1305_SHA256''TLS_AES_128_GCM_SHA256''TLS_AES_128_CCM_SHA256''TLS_AES_128_CCM_8_SHA256'
The first 3 are enabled by default. The last 2 CCM-based suites are supported
by TLSv1.3 because they may be more performant on constrained systems, but they
are not enabled by default since they offer less security.
Node_extra_ca_certs
В Node версии 7.3.0 и выше появилась переменная среды NODE_EXTRA_CA_CERTS, которая передается в файл СА-сертификата. Это позволяет дополнять «корневые» CA другими сертификатами. Сам файл сертификата должен состоять как минимум из одного доверенного сертификата в PEM-формате.
Perfect forward secrecy#
The term forward secrecy or perfect forward secrecy describes a feature
of key-agreement (i.e., key-exchange) methods. That is, the server and client
keys are used to negotiate new temporary keys that are used specifically and
only for the current communication session.
Perfect forward secrecy is achieved by randomly generating a key pair for
key-agreement on every TLS/SSL handshake (in contrast to using the same key for
all sessions). Methods implementing this technique are called “ephemeral”.
Currently two methods are commonly used to achieve perfect forward secrecy (note
the character “E” appended to the traditional abbreviations):
Ephemeral methods may have some performance drawbacks, because key generation
is expensive.
To use perfect forward secrecy using DHE with the tls module, it is required
to generate Diffie-Hellman parameters and specify them with the dhparam
option to tls.createSecureContext(). The following illustrates the use of
the OpenSSL command-line interface to generate such parameters:
openssl dhparam -outform PEM -out dhparam.pem 2048If using perfect forward secrecy using ECDHE, Diffie-Hellman parameters are
not required and a default ECDHE curve will be used. The ecdhCurve property
can be used when creating a TLS Server to specify the list of names of supported
curves to use, see tls.createServer() for more info.
Perfect forward secrecy was optional up to TLSv1.2, but it is not optional for
TLSv1.3, because all TLSv1.3 cipher suites use ECDHE.
Requirements
The exam questions cover all the most important issues of JavaScript Core and Client-Side JavaScript. An assessed candidate should demonstrate adequate knowledge of the following areas:
- General principles of programming,
- JavaScript Fundamentals: Syntax, Keywords, Data Types, Control Structures, Expressions and Operators
- Numbers, Strings, Arrays, Indexed Collections,
- Functions,
- Objects, Prototype based Object Oriented Programming, Classes,
- JavaScript in Web browser, DOM, Browser environment, Events, JavaScript Web APIs.
Check full list of JavaScript Certification Exam Topics
Server.addcontext(hostname, context)#
Added in: v0.5.3
The server.addContext() method adds a secure context that will be used if
the client request’s SNI name matches the supplied hostname (or wildcard).
When there are multiple matching contexts, the most recently added one is
used.
Server.setticketkeys(keys)#
Added in: v3.0.0
Sets the session ticket keys.
Changes to the ticket keys are effective only for future server connections.
Existing or currently pending server connections will use the previous keys.
See Session Resumption for more information.
Session identifiers#
Servers generate a unique ID for new connections and
send it to the client. Clients and servers save the session state. When
reconnecting, clients send the ID of their saved session state and if the server
also has the state for that ID, it can agree to use it. Otherwise, the server
will create a new session. See RFC 2246 for more information, page 23 and
30.
Session tickets#
The servers encrypt the entire session state and send it
to the client as a “ticket”. When reconnecting, the state is sent to the server
in the initial connection. This mechanism avoids the need for server-side
session cache. If the server doesn’t use the ticket, for any reason (failure
to decrypt it, it’s too old, etc.), it will create a new session and send a new
ticket. See RFC 5077 for more information.
Ssl-рукопожатие
Такие ошибки возникают в процессе SSL-рукопожатия. Клиент пытается установить соединение с сервером через TLS-рукопожатие. TLS-рукопожатие — это обмен сообщениями между клиентом и сервером, в ходе которого они договариваются о версии TLS и комбинации шифров, подтверждают подлинность сервера, а также генерируют ключи сессии.
В шаге 2 сервер отправляет сообщение со своим SSL-сертификатом, а клиент проверяет его через СА, выпустившего данный сертификат. Так подтверждается подлинность сервера, и клиент взаимодействует с истинным владельцем домена.
Эти ошибки возникают в случаях, когда клиент не может проверить самоподписанный сертификат сервера из шага 2.
Tls.checkserveridentity(hostname, cert)#
Added in: v0.8.4
Verifies the certificate cert is issued to hostname.
Returns <Error> object, populating it with reason, host, and cert on
failure. On success, returns <undefined>.
This function can be overwritten by providing alternative function as part of
the options.checkServerIdentity option passed to tls.connect(). The
overwriting function can call tls.checkServerIdentity() of course, to augment
the checks done with additional verification.
This function is only called if the certificate passed all other checks, such as
being issued by trusted CA (options.ca).
Tls.connect(path[, options][, callback])#
Added in: v0.11.3
Same as tls.connect() except that path can be provided
as an argument instead of an option.
A path option, if specified, will take precedence over the path argument.
Tls.connect(port[, host][, options][, callback])#
Added in: v0.11.3
Same as tls.connect() except that port and host can be provided
as arguments instead of options.
A port or host option, if specified, will take precedence over any port or host
argument.
Tls.createsecurepair([context][, isserver][, requestcert][, rejectunauthorized][, options])#
Creates a new secure pair object with two streams, one of which reads and writes
the encrypted data and the other of which reads and writes the cleartext data.
Generally, the encrypted stream is piped to/from an incoming encrypted data
stream and the cleartext one is used as a replacement for the initial encrypted
stream.
tls.createSecurePair() returns a tls.SecurePair object with cleartext and
encrypted stream properties.
Using cleartext has the same API as tls.TLSSocket.
The tls.createSecurePair() method is now deprecated in favor of
tls.TLSSocket(). For example, the code:
pair = tls.createSecurePair();
pair.encrypted.pipe(socket);
socket.pipe(pair.encrypted);
can be replaced by:
secureSocket = tls.TLSSocket(socket, options);where secureSocket has the same API as pair.cleartext.
Tls.createserver([options][, secureconnectionlistener])#
options<Object>ALPNProtocols: <string[]> | <Buffer[]> | <TypedArray[]> | <DataView[]> | <Buffer> | <TypedArray> | <DataView>
An array of strings,Buffers orTypedArrays orDataViews, or a single
BufferorTypedArrayorDataViewcontaining the supported ALPN
protocols.Buffers should have the format[len][name][len][name]...
e.g.0x05hello0x05world, where the first byte is the length of the next
protocol name. Passing an array is usually much simpler, e.g.
['hello', 'world']. (Protocols should be ordered by their priority.)clientCertEngine<string> Name of an OpenSSL engine which can provide the
client certificate.enableTrace<boolean> Iftrue,tls.TLSSocket.enableTrace()will be
called on new connections. Tracing can be enabled after the secure
connection is established, but this option must be used to trace the secure
connection setup. Default:false.handshakeTimeout<number> Abort the connection if the SSL/TLS handshake
does not finish in the specified number of milliseconds.
A'tlsClientError'is emitted on thetls.Serverobject whenever
a handshake times out. Default:120000(120 seconds).rejectUnauthorized<boolean> If notfalsethe server will reject any
connection which is not authorized with the list of supplied CAs. This
option only has an effect ifrequestCertistrue. Default:true.requestCert<boolean> Iftruethe server will request a certificate from
clients that connect and attempt to verify that certificate. Default:false.sessionTimeout<number> The number of seconds after which a TLS session
created by the server will no longer be resumable. See
Session Resumption for more information. Default:300.SNICallback(servername, callback)<Function> A function that will be
called if the client supports SNI TLS extension. Two arguments will be
passed when called:servernameandcallback.callbackis an
error-first callback that takes two optional arguments:errorandctx.
ctx, if provided, is aSecureContextinstance.
tls.createSecureContext()can be used to get a properSecureContext.
Ifcallbackis called with a falsyctxargument, the default secure
context of the server will be used. IfSNICallbackwasn’t provided the
default callback with high-level API will be used (see below).ticketKeys: <Buffer> 48-bytes of cryptographically strong pseudorandom
data. See Session Resumption for more information.pskCallback<Function>When negotiating TLS-PSK (pre-shared keys), this function is called
with the identity provided by the client.
If the return value isnullthe negotiation process will stop and an
“unknown_psk_identity” alert message will be sent to the other party.
If the server wishes to hide the fact that the PSK identity was not known,
the callback must provide some random data aspskto make the connection
fail with “decrypt_error” before negotiation is finished.
PSK ciphers are disabled by default, and using TLS-PSK thus
requires explicitly specifying a cipher suite with theciphersoption.
More information can be found in the RFC 4279.pskIdentityHint<string> optional hint to send to a client to help
with selecting the identity during TLS-PSK negotiation. Will be ignored
in TLS 1.3. Upon failing to set pskIdentityHint'tlsClientError'will be
emitted with'ERR_TLS_PSK_SET_IDENTIY_HINT_FAILED'code.…: Any
tls.createSecureContext()option can be provided. For
servers, the identity options (pfx,key/certorpskCallback)
are usually required.…: Any
net.createServer()option can be provided.
secureConnectionListener<Function>- Returns: <tls.Server>
Creates a new tls.Server. The secureConnectionListener, if provided, is
automatically set as a listener for the ‘secureConnection’ event.
The ticketKeys options is automatically shared between cluster module
workers.
Tls.getciphers()#
Added in: v0.10.2
Returns an array with the names of the supported TLS ciphers. The names are
lower-case for historical reasons, but must be uppercased to be used in
the ciphers option of tls.createSecureContext().
Cipher names that start with ‘tls_’ are for TLSv1.3, all the others are for
TLSv1.2 and below.
console.log(tls.getCiphers()); Tls.rootcertificates#
Added in: v12.3.0
An immutable array of strings representing the root certificates (in PEM format)
from the bundled Mozilla CA store as supplied by current Node.js version.
The bundled CA store, as supplied by Node.js, is a snapshot of Mozilla CA store
that is fixed at release time. It is identical on all supported platforms.
Tls/ssl concepts#
The TLS/SSL is a public/private key infrastructure (PKI). For most common
cases, each client and server must have a private key.
Private keys can be generated in multiple ways. The example below illustrates
use of the OpenSSL command-line interface to generate a 2048-bit RSA private
key:
openssl genrsa -out ryans-key.pem 2048With TLS/SSL, all servers (and some clients) must have a certificate.
Certificates are public keys that correspond to a private key, and that are
digitally signed either by a Certificate Authority or by the owner of the
private key (such certificates are referred to as “self-signed”). The first
step to obtaining a certificate is to create a Certificate Signing Request
(CSR) file.
The OpenSSL command-line interface can be used to generate a CSR for a private
key:
openssl req -new -sha256 -key ryans-key.pem -out ryans-csr.pemOnce the CSR file is generated, it can either be sent to a Certificate
Authority for signing or used to generate a self-signed certificate.
Creating a self-signed certificate using the OpenSSL command-line interface
is illustrated in the example below:
openssl x509 -req -in ryans-csr.pem -signkey ryans-key.pem -out ryans-cert.pemOnce the certificate is generated, it can be used to generate a .pfx or
.p12 file:
openssl pkcs12 -export -in ryans-cert.pem -inkey ryans-key.pem
      -certfile ca-cert.pem -out ryans.pfx
Where:
in: is the signed certificateinkey: is the associated private keycertfile: is a concatenation of all Certificate Authority (CA) certs into
a single file, e.g.cat ca1-cert.pem ca2-cert.pem > ca-cert.pem
Tlssocket.enabletrace()#
Added in: v12.2.0
When enabled, TLS packet trace information is written to stderr. This can be
used to debug TLS connection problems.
The format of the output is identical to the output of
openssl s_client -trace or openssl s_server -trace. While it is produced by
OpenSSL’s SSL_trace() function, the format is undocumented, can change
without notice, and should not be relied on.
Tlssocket.exportkeyingmaterial(length, label[, context])#
Added in: v13.10.0, v12.17.0
Keying material is used for validations to prevent different kind of attacks in
network protocols, for example in the specifications of IEEE 802.1X.
Example
const keyingMaterial = tlsSocket.exportKeyingMaterial(
  128,
  'client finished');
See the OpenSSL SSL_export_keying_material documentation for more
information.
Tlssocket.getcertificate()#
Added in: v11.2.0
Returns an object representing the local certificate. The returned object has
some properties corresponding to the fields of the certificate.
See tls.TLSSocket.getPeerCertificate() for an example of the certificate
structure.
If there is no local certificate, an empty object will be returned. If the
socket has been destroyed, null will be returned.
Tlssocket.getephemeralkeyinfo()#
Added in: v5.0.0
Returns an object representing the type, name, and size of parameter of
an ephemeral key exchange in perfect forward secrecy on a client
connection. It returns an empty object when the key exchange is not
ephemeral. As this is only supported on a client socket; null is returned
if called on a server socket.
For example: { type: ‘ECDH’, name: ‘prime256v1’, size: 256 }.
Tlssocket.getfinished()#
Added in: v9.9.0
As the Finished messages are message digests of the complete handshake
(with a total of 192 bits for TLS 1.0 and more for SSL 3.0), they can
be used for external authentication procedures when the authentication
provided by SSL/TLS is not desired or is not enough.
Corresponds to the SSL_get_finished routine in OpenSSL and may be used
to implement the tls-unique channel binding from RFC 5929.
Tlssocket.getpeercertificate([detailed])#
Added in: v0.11.4
Returns an object representing the peer’s certificate. If the peer does not
provide a certificate, an empty object will be returned. If the socket has been
destroyed, null will be returned.
If the full certificate chain was requested, each certificate will include an
issuerCertificate property containing an object representing its issuer’s
certificate.
Tlssocket.getpeerfinished()#
Added in: v9.9.0
As the Finished messages are message digests of the complete handshake
(with a total of 192 bits for TLS 1.0 and more for SSL 3.0), they can
be used for external authentication procedures when the authentication
provided by SSL/TLS is not desired or is not enough.
Corresponds to the SSL_get_peer_finished routine in OpenSSL and may be used
to implement the tls-unique channel binding from RFC 5929.
Tlssocket.getpeerx509certificate()#
Added in: v15.9.0
Returns the peer certificate as an <X509Certificate> object.
If there is no peer certificate, or the socket has been destroyed,
undefined will be returned.
Tlssocket.getprotocol()#
Added in: v5.7.0
Returns a string containing the negotiated SSL/TLS protocol version of the
current connection. The value ‘unknown’ will be returned for connected
sockets that have not completed the handshaking process. The value null will
be returned for server sockets or disconnected client sockets.
Protocol versions are:
'SSLv3''TLSv1''TLSv1.1''TLSv1.2''TLSv1.3'
See the OpenSSL SSL_get_version documentation for more information.
Tlssocket.getsession()#
Added in: v0.11.4
Returns the TLS session data or undefined if no session was
negotiated. On the client, the data can be provided to the session option of
tls.connect() to resume the connection. On the server, it may be useful
for debugging.
See Session Resumption for more information.
Note: getSession() works only for TLSv1.2 and below. For TLSv1.3, applications
must use the ‘session’ event (it also works for TLSv1.2 and below).
Tlssocket.gettlsticket()#
Added in: v0.11.4
For a client, returns the TLS session ticket if one is available, or
undefined. For a server, always returns undefined.
It may be useful for debugging.
See Session Resumption for more information.
Tlssocket.getx509certificate()#
Added in: v15.9.0
Returns the local certificate as an <X509Certificate> object.
If there is no local certificate, or the socket has been destroyed,
undefined will be returned.
Tlssocket.renegotiate(options, callback)#
Added in: v0.11.8
The tlsSocket.renegotiate() method initiates a TLS renegotiation process.
Upon completion, the callback function will be passed a single argument
that is either an Error (if the request failed) or null.
This method can be used to request a peer’s certificate after the secure
connection has been established.
When running as the server, the socket will be destroyed with an error after
handshakeTimeout timeout.
For TLSv1.3, renegotiation cannot be initiated, it is not supported by the
protocol.
X509 certificate error codes#
Multiple functions can fail due to certificate errors that are reported by
OpenSSL. In such a case, the function provides an <Error> via its callback that
has the property code which can take one of the following values:
'UNABLE_TO_GET_ISSUER_CERT': Unable to get issuer certificate.'UNABLE_TO_GET_CRL': Unable to get certificate CRL.'UNABLE_TO_DECRYPT_CERT_SIGNATURE': Unable to decrypt certificate’s
signature.'UNABLE_TO_DECRYPT_CRL_SIGNATURE': Unable to decrypt CRL’s signature.'UNABLE_TO_DECODE_ISSUER_PUBLIC_KEY': Unable to decode issuer public key.'CERT_SIGNATURE_FAILURE': Certificate signature failure.'CRL_SIGNATURE_FAILURE': CRL signature failure.'CERT_NOT_YET_VALID': Certificate is not yet valid.'CERT_HAS_EXPIRED': Certificate has expired.'CRL_NOT_YET_VALID': CRL is not yet valid.'CRL_HAS_EXPIRED': CRL has expired.'ERROR_IN_CERT_NOT_BEFORE_FIELD': Format error in certificate’s notBefore
field.'ERROR_IN_CERT_NOT_AFTER_FIELD': Format error in certificate’s notAfter
field.'ERROR_IN_CRL_LAST_UPDATE_FIELD': Format error in CRL’s lastUpdate field.'ERROR_IN_CRL_NEXT_UPDATE_FIELD': Format error in CRL’s nextUpdate field.'OUT_OF_MEM': Out of memory.'DEPTH_ZERO_SELF_SIGNED_CERT': Self signed certificate.'SELF_SIGNED_CERT_IN_CHAIN': Self signed certificate in certificate chain.'UNABLE_TO_GET_ISSUER_CERT_LOCALLY': Unable to get local issuer certificate.'UNABLE_TO_VERIFY_LEAF_SIGNATURE': Unable to verify the first certificate.'CERT_CHAIN_TOO_LONG': Certificate chain too long.'CERT_REVOKED': Certificate revoked.'INVALID_CA': Invalid CA certificate.'PATH_LENGTH_EXCEEDED': Path length constraint exceeded.'INVALID_PURPOSE': Unsupported certificate purpose.'CERT_UNTRUSTED': Certificate not trusted.'CERT_REJECTED': Certificate rejected.'HOSTNAME_MISMATCH': Hostname mismatch.
Зачем учить node.js?
Чтобы создавать приложения на HTML5, нужно постоянно осваивать новые технологии и инструменты. Браузер с HTML5 — довольно изменчивая платформа.
Node.js — один из «мастхэв»-средств разработки клиентских приложений. Это среда выполнения JavaScript-программ, построенная на JavaScript-движке Chrome V8. Node.js позволяет запускать написанные на JavaScript программы из командной строки прямо на компьютере. Большинство инструментов разработчика клиентской части рассчитано на применение Node.js.
Изучение node.js
В этом курсе вы пройдете основы Node.JS и узнаете, как создавать простые приложения. Преподаватель рассматривает такие темы, как npm, чтение и запись файлов, фреймворки Node.JS. Функции async/wait и другие популярные вопросы веб-разработки также затрагиваются в последующих лекциях. К концу обучения вы будете достаточно уверены, чтобы спланировать и создать свое собственное приложение.
С этой программой на Lynda вы сможете получить доступ к сотням других занятий по веб-разработке за цену всего одного курса.
Как все исправить?
Чтобы избавиться от ошибок сертификатов, следует пользоваться свойством ca или NODE_EXTRA_CA_CERTS. Но появление тех же сообщений об ошибках все еще возможно. Как правило, это вызвано использованием неправильного сертификата.
Получить полную цепочку сертификатов можно через OpenSSL:
openssl s_client -connect ${REMHOST}:${REMPORT}Пример цепочки сертификатов:
Внимание: команда showcerts не всегда работает при выполнении ее с прокси-сервера либо в случаях, когда удаленный сервер использует SNI.
Как нормально запустить ssl сертификат на node js
имеется SSL сертификат(достоверенный) и приложение на ноде:var fs=require("fs");
var express = require('express');
var https = require('https');
var redis=require("redis");
var client = redis.createClient();
var mysql=require("mysql");
var app = express();
client.on("error", function (err) {
console.log("Error " err);
});
var options = {
key: fs.readFileSync('ssl/key.pem', 'utf8'),
cert: fs.readFileSync('ssl/server.crt', 'utf8')
};
var server=https.createServer(options, function(req, res){
console.log("https сервер запущен");
}).listen(9099);
var io = require("socket.io")(server);
Пробовал запустить код, но выдавало ошибку: crypto.js:132
if (options.cert) c.context.setCert(options.cert); ^
Error: error:0906D06C:PEM routines:PEM_read_bio:no start line
Нашел решение через выполнение:openssl req -newkey rsa:2048 -new -nodes -keyout key.pem -out csr.pem
openssl x509 -req -days 365 -in csr.pem -signkey key.pem -out server.crt
И var options = {
key: fs.readFileSync('./key.pem', 'utf8'),
cert: fs.readFileSync('./server.crt', 'utf8')
};
Теперь все запускается, но выдает сообщение о том, что сертификат недостоверный(необходимо подтвердить действие перехода) его еще и скачать нужно на компьютер, дабы браузер открыл. Может кто сталкивался с подобным, что можно сделать?
Как установить доверенный сертификат в систему средствами node.js?
Необходимо тестировать веб-приложения на https соединении локально.
Нашли такое решение:
Через /etc/hosts для 127.0.0.1 прописывается резолв дополнительных доменов
Сделали самоподписанный корневой сертификат, им подписываются сертификаты на локальные домены приложений
Хочется автоматизировать добавление корневого сертификата в доверенные, желательно средствами node.js
Как не спрашивал гугл – все ведет на ручную установку…
Целевые платформы:
– deb-based дистрибутивы linux (преимущественно Ubuntu/Mint) – Chrome, FF
– osX – Safari, Chrome
– win10 – MS Edge, Yandex.Browser, Chrome
Так же полагаю, что понадобятся запрос привилегий суперпользователя, на linux есть gksudo, а есть ли аналоги на osX и win?
Мысли о необходимости сертификатов (вместо вступления)
Для начала немного лирики о том, почему необходимо проходить сертификацию (можно смело пропускать и переходить к конкретике). Каждый инженер, так или иначе, вынужден выбирать для себя профиль, который будет для него основным. Этот профиль тесно связан с основным языком, с которым он работает.
Но повседневные задачи почти всегда оставляют свой отпечаток на программисте, заставляя его неравномерно использовать разные части языка. В результате какие-то части он знает лучше, а какие-то хуже. Некоторые парадигмы и шаблоны он способен применить с закрытыми глазами, а для некоторых необходимо открыть документацию.
Возьмем к примеру инженера, который пишет на Android. В силу специфики, он большую часть времени использует Java 6 и даже будучи осведомлен о всех нововведениях в Java 7 на практике, он сталкивается с ней реже. Так и получается, что не смотря на надпись в резюме Java 7, такой кандидат может не всегда эффективно выполнять задачи связанные, скажем, с Fork/Join или NIO2.
Так и получается, что люди, которые чуть ли не бесценны на своем рабочем месте и сами ощущают глубину своих знаний языка, иногда с треском проваливают даже поверхностные интервью по их родной теме. Так часто бывает с молодыми специалистами, которые действительно не всегда знакомы со своим языком в полной мере.
Сертификат же подтверждает то, что знания специалиста достаточно глубоки во всех аспектах языка, а не только в многопоточности или IO, или коллекциях. Сертификат в первую очередь является стимулом к более глубокому изучению языка, с которым работаешь, а так же дает более объективное представление того, какими реальным знаниями обладает специалист в данной области. Даже при сдаче первого уровня я открыл для себя новое, но обо всем по прядку. И так…
Платные курсы
Платные курсы – более осознанный шаг в изучении программирования. Серьезные образовательные платформы в качестве преподавателей нанимают профессионалов из крупных российских технологических компаний и кроме изучения теории уделяют много времени практическим занятиям.
После обучения в GeekBrains выдается диплом о профессиональной подготовке и электронный сертификат, которые можно добавить в портфолио и показать работодателю.
Какой бы вариант вы ни выбрали, всегда важна мотивация и четкий ответ на вопрос «Зачем?»
Без применения на практике полученные знания так и останутся бесполезной информацией. С другой стороны, можно годами программировать, быть классным профессионалом с огромным боевым опытом и не иметь никаких сертификатов.
Это, разумеется, не означает, что сертификаты бесполезны. Во время обучения на курсах или при подготовке к экзаменам знания систематизируются и шлифуются. Появляется понимание нюансов и тонкостей, которые во время работы сложно заметить.
Из очевидных плюсов сертификатов по Java выделим следующие:
- Вы лучше узнаете Java, потому что всегда можно найти для себя что-то новое.
- Появится преимущество при приеме на работу. HR крупных компаний из нескольких специалистов выберут того, у которого есть официальное подтверждение квалификации.
- Вырастет ваша ценность как специалиста и, соответственно, вы сможете претендовать на более высокую зарплату.
Если вы считаете, что сертификат нужен, а если вам кажется, будто он бесполезен – вы снова правы. Изначально важен мотив, а ваш профессионализм зависит только от вас и ни от кого более.
***
Если вы только начинаете свой путь в профессии, обратите внимание на курс факультета Java-разработки онлайн-академии GeekBrains. За 12 месяцев занятий с практикующими преподавателями из крупнейших российских технологических компаний вы освоите основы языка или систематизируете уже имеющиеся знания.
Подготовка к сдаче java programmer ii
Готовиться к Java Programmer II не вызывает ничего затруднительного. Главным образом из-за двух причин. Первое это то, что Oracle любезно пердоставил не только полный список тем, которые надо знать, но и полный
, для подготовки, где есть вся необходимая информация. Так же в сети можно найти дампы с вопросами.
Например вот тут
Судя по всему, дампы с вопросами из бесплатного доступа уже изъяли. Но можно раскошелиться и купить, за небольшую сумму на многих платных сайтах. Хочу сказать лишь то, что все они перепечатали вопросы из одного и того же источника. Во многих вопросах ошибки и во многих неверные ответы.
На экзамене вопросы пересекаются с теми, что можно найти в интернете — процентов на 10 от силы, однако, все же, в этих вопросах есть огромная ценность. Они четко дают представление о том, какой уровень этих вопросов и о чем именно будут спрашивать. Пройдя их после обучения оффициалным туториалом, становишся намного более уверенным в себе.
Но, само собой, главный помощник, без которого однозначно трудно сдать экзамен, — это практика, практика и еще раз практика! Очень трудно ответить на большое количество вопросов, если не пользуешься часто тем, о чем спрашивают.
Свойство ca
Более безопасным способом будет указать, какой именно CA-сертификат ожидается от сервера. Иначе говоря, название сертификата должно совпадать с сертификатом сервера.
request({
ca: [fs.readFileSync([certificate path])],
rejectUnauthorized: true,
}
Как вы могли заметить, ca — это массив, в котором при желании можно прописать несколько файлов сертификатов. Минус данного решения в том, что сертификат прописывается в самом в коде. Это весьма чревато в случае, когда нам нужно управлять несколькими версиями сертификатов в разных средах.
Сдача
Сдача проходит в течении 150 минут (2.5 часа). С собой на сдачу не допускается приносить даже листик бумаги — все выдадут на месте. На экзамене будет предложено 90 вопросов. Все они в стиле «выберите правильный ответ» или «выберите несколько правильных ответов». Вопросы можно помечать и вернутся к ним позже, если в ответе неуверенны.
С ноября 2021 года, при сдаче, результат сообщается не сразу. Результат экзамена отправляет Oracle на указанную почту в течении 30 минут после того, как экзамен сдан. Так что, после сдачи Oracle теперь любезно заставляет немного понервничать. Но это не единственное нововведение, теперь нет необходимости после сдачи обновлять свой профайл в Oracle с новым сертификатом, — все происходит автоматически и через 24 часа вся информация уже есть на сайте.
Сертификаты об окончании курсов
Получить документ можно и пройдя обучение на какой-нибудь онлайн-платформе. Здесь разброс весьма широк: от обычного подтверждения о прослушанном курсе до дипломов о профессиональной подготовке.
Польза от таких сертификатов есть, когда информация курса усвоена полностью (все-таки главная задача образовательных платформ – именно обучение, а не выдача бумажек), но опыта работы маловато. Диплом поможет устроиться на стажировку, получить должность разработчика-джуна или продемонстрировать на собеседовании способность развиваться. Знания здесь гораздо важнее самого документа.
Сертификация javascript разработчиков. мои впечатления
Компания, в которой я работаю, является партнёром Microsoft. Все компании-партнеры должны иметь в своем штате некоторое число сертифицированных специалистов. В один ясный солнечный день нам было предложено пройти сертификацию по какому-либо направлению. Соответствующие статьи в интернете утверждали, что сертификация — штука полезная и проходить её стоит по нескольким причинам. Ну, а поскольку расходы все равно оплачивал работодатель, я в решил углубиться в тему и пройти сразу несколько сертификаций.
Основная проблема любой сертификации заключается в том, что по сути дела, это некая бумажка, от некой компании, которая подтверждает твои знания в какой-либо отрасли. А поскольку никто-никому не доверяет, в реальной жизни имеет вес только бумажка от какой-то очень большой и хорошо знакомой всем фирмы. Таких фирм в области web-технологий я обнаружил только две: Microsoft и CIW. Они отвечали следующим требованиям:
В интернете можно найти очень много online-тестов, некоторые из них даже платные. Но все они остаются всего лишь тестами на каком-то noname сайте. В случае Microsoft и CIW:
Все это выглядело довольно убедительно и внушало доверие.
У каждой сертификации есть некий путь. Получив один сертификат, вы можете сдать другой и так далее, пока не получите ключевой сертификат и какую-либо степень.
Т.к. сертификацию Microsoft мне оплачивали, я решил пройти полную ветку по своему направлению:
В случае CIW я сдал только одно тестирование:
Кроме стоимости, в ветке CIW меня также смущала необходимость сдавать тестирование по Perl, который я не знал и не особо понимал перспектив его развития.
Касательно самих вопросов:
- Почти ко всем тестам в интернете можно найти бесплатные старые дампы и потренироваться. На практике может совпасть от 50% до 95% вопросов.
- Я не знаю английского (а все четыре тестирования были на английском). Местами я даже примерно не понимал вопросов и нажимал наугад. В этом плане помогает код, т.к. в независимости от вопроса, можно посмотреть ответы и выбрать тот, в котором не будет явных ошибок.
- В тестах есть ошибки и в старых дампах тоже. Многие вопросы в тестах мне показались — элементарными. Многие бессмысленными, т.к. спрашивают о вещах, которые есть только в IE.
- Время, которое дается на сдачу тестов, как правило, в три-четыре раза больше, чем нужно на самом деле. Так один из сертификатов Microsoft я сдал за пол часа, хотя на тестирование было выделено три часа времени.
- Страшная комната без ничего с видеокамерой оказалась вполне милой офисной коморкой.
- Когда читал о сертификации, представлял её более трудной, чем было на самом деле. В зависимости от теста, она может быть очень легкой (особенно если вы многократно прошли старые дампы и научились отвечать даже не читая вопросы и ответы).
Какую выгоду я получил от прохождения сертификации:
Лично я — никакую. Они даже цветную картонку не дадут (на самом деле её можно заказать, но она будет стоить ещё несколько тысяч и придет почтой из США).
На всякий случай повторюсь, что все описанное выше, относится только к сертификации по JavaScript. Знакомая, которая сдавала сертификацию по SQL, пару месяцев тренировалась на оптимизации запросов длинною в страницу формата А4, так что все субъективно.
This entry passed through the Full-Text RSS service — if this is your content and you’re reading it on someone else’s site, please read the FAQ at http://ift.tt/jcXqJW.
Tlssocket.setmaxsendfragment(size)#
Added in: v0.11.11
The tlsSocket.setMaxSendFragment() method sets the maximum TLS fragment size.
Returns true if setting the limit succeeded; false otherwise.
Smaller fragment sizes decrease the buffering latency on the client: larger
fragments are buffered by the TLS layer until the entire fragment is received
and its integrity is verified; large fragments can span multiple roundtrips
and their processing can be delayed due to packet loss or reordering. However,
smaller fragments add extra TLS framing bytes and CPU overhead, which may
decrease overall server throughput.
Spoiler#handleclick”>отзыв
«Я получил настоящее удовольствие от этого курса по MEAN, который прошел после завершения „Полного руководства по Angular“. Курс дает всестороннее понимание стека, очень понятно, по отдельности рассматриваются фронтенд и бэкенд, при этом показываются и объясняются потоки взаимодействия между ними.
Client-initiated renegotiation attack mitigation#
The TLS protocol allows clients to renegotiate certain aspects of the TLS
session. Unfortunately, session renegotiation requires a disproportionate amount
of server-side resources, making it a potential vector for denial-of-service
attacks.
To mitigate the risk, renegotiation is limited to three times every ten minutes.
An ‘error’ event is emitted on the tls.TLSSocket instance when this
threshold is exceeded. The limits are configurable:
The default renegotiation limits should not be modified without a full
understanding of the implications and risks.
TLSv1.3 does not support renegotiation.